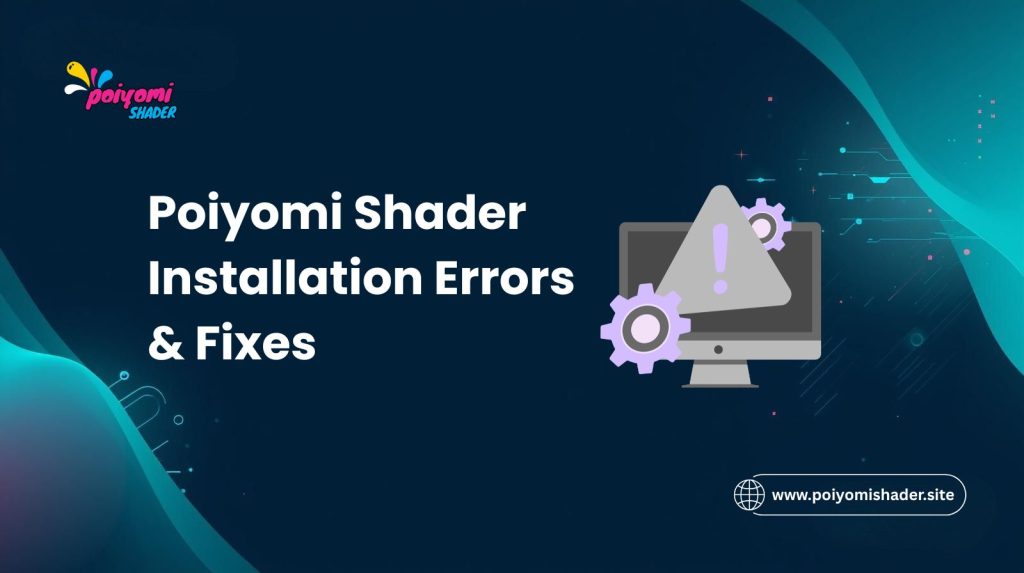
Introduction
Nothing is more frustrating than downloading Poiyomi Shader, following the import steps, and then opening Unity to find pink materials, red console errors, or a shader inspector that simply refuses to display correctly. Installation errors are one of the most frequent pain points for new Poiyomi Toon Shader users, and they can feel overwhelming when you do not know what is causing them or where to start looking for a solution.
The reality is that almost every Poiyomi Shader installation error has a clear and fixable cause. Whether you are dealing with shader compilation failures, missing files, Unity version conflicts, or VRChat SD compatibility conflicts, there is a systematic approach to identifying and fixing each problem.
This complete troubleshooting guide covers every major installation error Poiyomi Shader users encounter, explains exactly what causes each one, and walks you through the precise steps to fix them quickly and get back to creating.
What Is a Poiyomi Shader Installation Error?
A Poiyomi Shader installation error is any issue that occurs during or after importing the Poiyomi Toon Shader into a Unity project, preventing it from functioning correctly. These errors can range from visible symptoms, such as pink materials and broken inspector panels, to less obvious issues, such as silent shader compilation failures that only become apparent when you try to apply the shader to a mesh.
Understanding the nature of installation errors helps you approach troubleshooting methodically rather than randomly trying fixes.
Most Poiyomi Shader errors fall into one of three root cause categories: environment issues caused by incompatible Unity versions or render pipelines, import issues caused by corrupted downloads or incomplete imports, and conflict issues caused by existing assets or packages in your project interfering with the shader.
Poiyomi Shader Error Categories Overview
Beforeexploringo specific errors and fixes, it helps to understand the broad categories that most Poiyomi Shader installation problems fall into:
- Environment errors caused by Unity version incompatibility or the wrong render pipeline
- Download errors caused by corrupted or incomplete package files from unofficial sources
- Import errors caused by interrupted imports or conflicts with existing project assets
- Compilation errors caused by shader code conflicts, as well as dependencies inside the project.
- Configuration errors caused by incorrect material or project settings after a successful import
How to Read Unity Console Error Messages
The Unity Console window is your most important diagnostic tool when troubleshooting Poiyomi Shader installation errors. Learning to read console messages correctly saves significant troubleshooting time. Red messages are errors that prevent something from working and always require attention. Yellow messages indicate potential issues but do not necessarily break functionality.
White messages are informational logs that can generally be ignored during troubleshooting. When diagnosing a Poiyomi Shader error, always filter the console to show errors only and read the full error message, including the file path and line number references.
Pink Materials Error in Poiyomi Shader
Pink materials are the most immediately visible and most commonly encountered Poiyomi Shader installation error. When you apply a Poiyomi Toon Shader material to a mesh, and it appears solid pink, it means Unity cannot find or compile the shader correctly and is displaying its error fallback color instead.
Common Causes of Pink Materials
Pink materials in Poiyomi Shader almost always trace back to one of these specific causes:
- The Unity project is using URP or HDRP instead of the required Built-In Render Pipeline.
- The Poiyomi Shader package was imported into an incompatible version of Unity.
- The import process was interrupted before completing, leaving shader files incomplete.
- An older version of Poiyomi Shader is conflicting with a newly imported version.
- The downloaded package file was corrupted during download from an unofficial source.
- Shader compilation was blocked by antivirus software during the import process.
Step-by-Step Pink Material Fix
Follow these steps to resolve pink materials caused by a Poiyomi Shader installation error:
- Open the Unity Console window and look for the shader compilation error messages.
- Confirm your project is using the Built-In Render Pipeline in Edit > Project Settings > Graphics.
- Delete the entire Poiyomi folder from your Assets directory to remove any partial installation.
- Redownload the Poiyomi Shader package from the official GitHub repository.
- Close and reopen your Unity project before importing the freshly downloaded package.
- Import the new package with all files selected, then wait for the full compilation to complete.
- After import, press Ctrl+R to force a project refresh and recompile all shaders.
- Apply the Poiyomi Toon shader to a test material and confirm the pink error is resolved.
Poiyomi Shader Console Errors After Import
Red console errors appearing after a Poiyomi Shader import are the second most common category of installation problems. Unlike pink materials, which are immediately visible on meshes, console errors can sometimes go unnoticed until they cause unforeseen behavior in your project.
Namespace and Assembly Errors
Namespace and assembly errors in the Unity console after a Poiyomi Shader import typically appear as messages about missing types, undefined namespaces, or assembly definition conflicts. These errors usually indicate one of the following situations:
- A previous version of Poiyomi Shader was not fully removed before the new version was imported.
- Another shader package in your project is using conflicting namespace definitions.
- The import included only partial files due to an interrupted or incomplete package import process.
To fix namespace and assembly errors, completely remove the existing Poiyomi Shader folder from your project Assets, clear the Unity Library cache by deleting the Library folder from your project directory outside of the Unity editor, reopen the project to allow Unity to rebuild the cache from scratch, and then reimport the Poiyomi Shader package cleanly.
Shader Compilation Warning Messages
Shader compilation warnings are yellow console messages that appear during or after Poiyomi Shader import. Unlike red errors, warnings do not prevent the shader from functioning but can indicate suboptimal configurations.
Common Poiyomi Shader compilation warnings include messages about unused shader variants, deprecated feature references, or platform-specific shader limitations. These warnings are mostly harmless and can be safely ignored in most project contexts.
Poiyomi Shader Inspector Not Displaying Correctly
A correctly installed Poiyomi Shader should display a rich, fully featured inspector panel when a Poiyomi Toon material is selected. If the inspector appears blank, displays only basic Unity material properties, or shows an error message instead of the Poiyomi Shader interface, the problem is with how the shader editor scripts were imported.
Missing Inspector Panel Fix
When the Poiyomi Shader inspector panel is missing or not displaying correctly, the issue is almost always related to the editor scripts that power the custom inspector interface. Here is how to fix a missing Poiyomi Shader inspector panel:
- Confirm the Poiyomi folder in your Assets contains both a Runtime and an Editor subfolder.
- If the Editor folder is missing, the import was incomplete. Reimport the full package.
- Check the Unity Console for any editor script compilation errors related to Poiyomi files.
- Try switching to a different material and back to force the inspector to refresh.
- If the problem continues, close the Unity project, delete the Library folder, and reopen to force a full recompile.
Partial Inspector Display Issues
Sometimes the Poiyomi Shader inspector displays, but only some sections, or it appears visually broken with overlapping elements. This is typically caused by an incompatibility between the Unity editor version and the display scaling on high-DPI monitors.
Updating to the latest patch version of your current Unity LTS release and resetting your Unity editor layout under Window > Layouts > Default usually resolves partial display issues without requiring a full reinstallation.
Poiyomi Shader and VRChat SDK Conflict Errors
For VRChat avatar creators, one of the most specific and frustrating categories of Poiyomi Shader installation errors involves conflicts between the shader and the VRChat SDK. These conflicts appear as console errors referencing VRChat SDK components, avatar descriptor issues, or build errors when attempting to upload an avatar.
Here is a complete overview of the most common Poiyomi Shader and VRChat SDK conflict errors, along with their causes and fixes:
| Pink materials on avatar upload | Shader not locked before upload | Lock all Poiyomi materials using the Lock button |
| Build errors referencing Poiyomi files | SDK version mismatch with shader version | Update both the VRChat SDK and the Poiyomi Shader to the latest versions |
| Avatar performance rank showing Very Poor | Too many unlocked Poiyomi materials | Lock all materials and disable unused shader modules |
| Missing shader on Quest build | Poiyomi is not Quest compatible | Create a separate Quest avatar with mobile approved shader |
| Console errors after SDK update | Old Poiyomi version incompatible with new SDK | Delete the Poiyomi folder and reinstall the latest version |
| Shader variants bloating build size | Too many enabled modules across materials | Disable unused modules and lock all materials before building |
Poiyomi Shader Update Errors and Migration Issues
Updating Poiyomi Shader from an older version to a newer version is a common source of installation errors, particularly when jumping between major version releases. The most important rule for updating Poiyomi Shader is to always remove the old version completely before importing the new one. Never import over an existing installation.
Common update errors and their fixes include the following situations. When materials lose their property values after an update, the shader property names may have changed between versions. Check the Poiyomi Shader changelog for migration notes specific to your version jump.
After an update, if the shader dropdown no longer shows Poiyomi Toon, the shader path may have changed. Reassign the shader manually from the updated shader menu location. When AudioLink stops working after an update, confirm that your AudioLink package version is compatible with the new Poiyomi Shader version and update AudioLink if necessary.
Poiyomi Shader Slow Compilation and Performance Issues
Some users experience extremely slow shader compilation times after installing Poiyomi Shader, with Unity freezing or becoming unresponsive for extended periods during shader variant compilation. This is not technically an error, but it can feel like one when Unity appears stuck.
Poiyomi Shader generates a large number of shader variants to support its extensive feature set, and compiling all of these variants on first impression is resource-intensive. Here are the most effective ways to manage slow Poiyomi Shader compilation in Unity:
- Use the Lock feature on all Poiyomi Shader materials to strip unused shader variants, dramatically reducing compilation overhead.
- Enable the Asynchronous Shader Compilation option in Unity Project Settings to prevent the editor from freezing during compilation.
- Delete the ShaderCache folder from your Unity project’s Library directory to force a clean shader recompile if compilation appears stuck.
- Reduce the number of active Poiyomi Shader feature modules across your materials to minimize the total number of variants.
- Upgrade to a Unity version with improved shader compilation performance if available for your target platform.
Poiyomi Shader Reinstallation Complete Checklist
When all debugging steps have failed, and you need to perform a complete clean reinstallation of Poiyomi Shader, follow this complete checklist to ensure the reinstallation succeeds:
- Back up your entire Unity project to an external location before making any changes
- Close the Unity project, then navigate to the project folder in your file system.
- Delete the Poiyomi folder from the Assets directory.
- Delete the Library folder from the project root to force a complete cache rebuild.
- Delete the Temp folder from the project root if present.
- Reopen the Unity project and allow it to fully rebuild before importing anything.
- Redownload the latest Poiyomi Shader package from the official GitHub repository.
- Import the freshly downloaded package, selecting all files.
- Wait for the full compilation to complete without interrupting the process.
- Verify the installation using the console check and test material steps outlined earlier in this guide.
Conclusion
Poiyomi Shader installation errors are almost always solvable once you understand what is causing them and follow the right diagnostic steps. Pink materials, console errors, missing inspectors, VRChat SDK conflicts, and slow compilation are common experiences thousands of creators have worked through before you, and each has a clear fix.
The key to successful Poiyomi Shader troubleshooting is a systematic approach: read the console carefully, identify the root cause category, apply the appropriate fix, and verify the result before moving on.
With the solutions in this guide, you have everything you need to resolve any Poiyomi Shader installation issue and get back to what matters most: creating stunning materials and avatars with the best free Unity toon shader available.
Frequently Asked Questions
1. What causes pink materials after installing Poiyomi Shader?
Pink materials after installing Poiyomi Shader are caused by a shader compilation failure, which prevents Unity from rendering the material correctly and displays the pink fallback error color instead. The most common causes are using the wrong Unity render pipeline, an incompatible Unity version, or an incomplete package import that left shader files missing or corrupted.
2. How do I fix red console errors after importing Poiyomi Shader?
To fix red console errors after importing Poiyomi Shader, first read the full error message to identify the specific cause. Then, completely remove the existing Poiyomi folder from your Assets, delete the Unity Library cache folder, reopen your project, and reimport a freshly downloaded copy of the Poiyomi Shader from the official GitHub repository, selecting all files.
3. Can I install Poiyomi Shader over an existing older version?
It is strongly recommended not to install Poiyomi Shader on top of an older version. Always delete the existing Poiyomi folder from your Assets directory before importing a new version. Installing over an existing version often causes file conflicts, namespace errors, and broken materials, which are difficult to diagnose and fix after the fact.
4. Does Poiyomi Shader work with Unity URP or HDRP projects?
No, Poiyomi Shader is only compatible with Unity’s Built-In Render Pipeline. If your project uses URP or HDRP, Poiyomi Shader will not compile correctly and will display pink materials on any mesh it is applied to. You will need to either switch your project to the Built-In Render Pipeline or use a different shader that supports your current pipeline.
5. How do I fix Poiyomi Shader errors caused by a VRChat SDK conflict?
VRChat SDK conflicts with Poiyomi Shader are most commonly resolved by ensuring both the VRChat SDK and Poiyomi Shader are up to date with the latest compatible versions. Delete the existing Poiyomi Shader folder, update your VRChat SDK through the Creator Companion, then reinstall the latest version of Poiyomi Shader. Always lock all materials before attempting an avatar upload.
6. How long does Poiyomi Shader take to compile after installation?
Poiyomi Shader compilation time varies depending on your computer hardware and the number of shader variants being compiled. On a modern PC, initial compilation typically takes between five and twenty minutes. Using the Lock feature on all materials significantly reduces compilation time in subsequent Unity editor sessions by removing unused shader variants from the compilation queue.
Latest Post: